> ## Documentation Index
> Fetch the complete documentation index at: https://omnifit-64.mintlify.site/llms.txt
> Use this file to discover all available pages before exploring further.
# Request Information
> Contains information about Chat Components under Request Information.
Flow will not move ahead until user gives the requested information to the bot.
### **1. Name**
* It is used to request the user's "name" as information.
* Click on "Name" under the Add Chat Component.
* Then, you can customize the name request message in the "Customize Bot Message" section.
### **2. Phone Number**
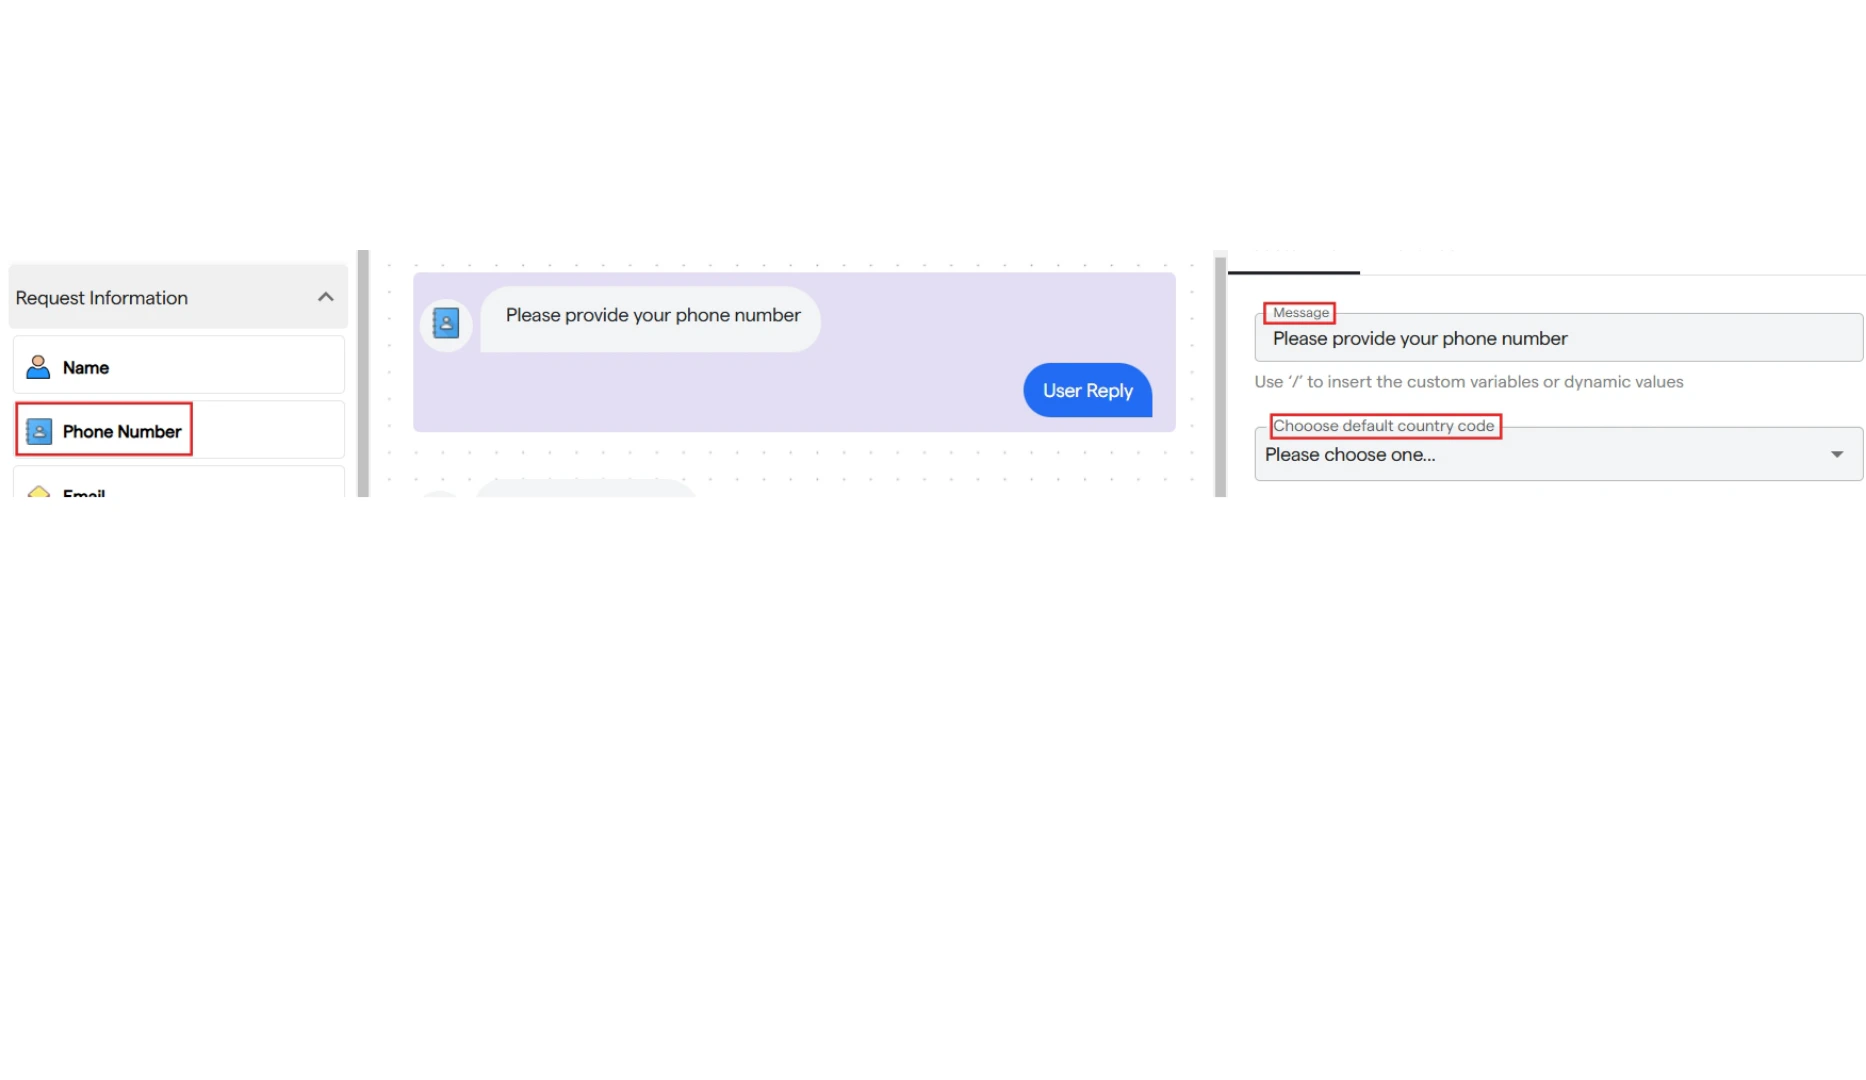
* It is used to request the user's "phone number" as information.
* Click on "Phone Number" to add it to your flow.
* Then, you can customize the phone number request message in the "Customize Bot Message" section.
* You can also select a specific country code by clicking on the dropdown.
 ### **3. Email**
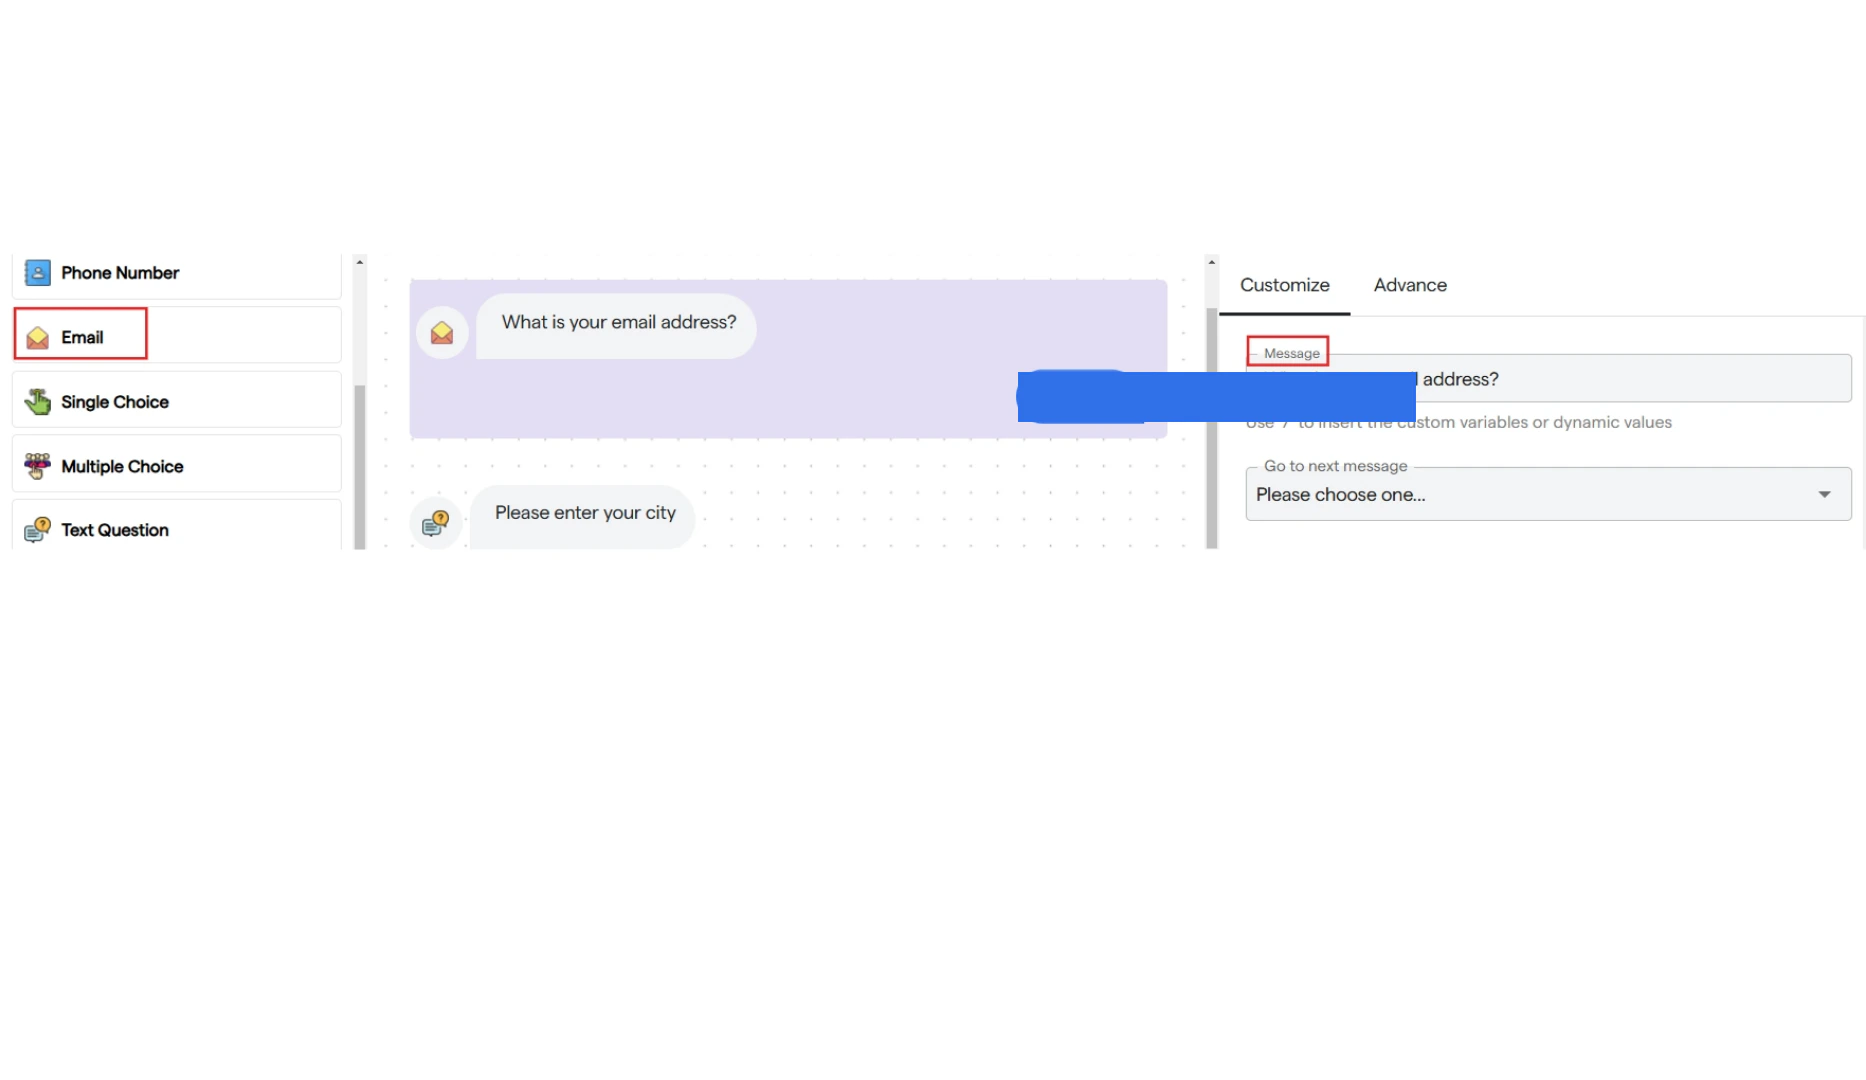
* It is used to request the user's "email" as information.
* Click on "Email" to add it to your flow.
* You can customize the email request message in the "Customize" panel.
### **3. Email**
* It is used to request the user's "email" as information.
* Click on "Email" to add it to your flow.
* You can customize the email request message in the "Customize" panel.
 ### **4. Single Choice**
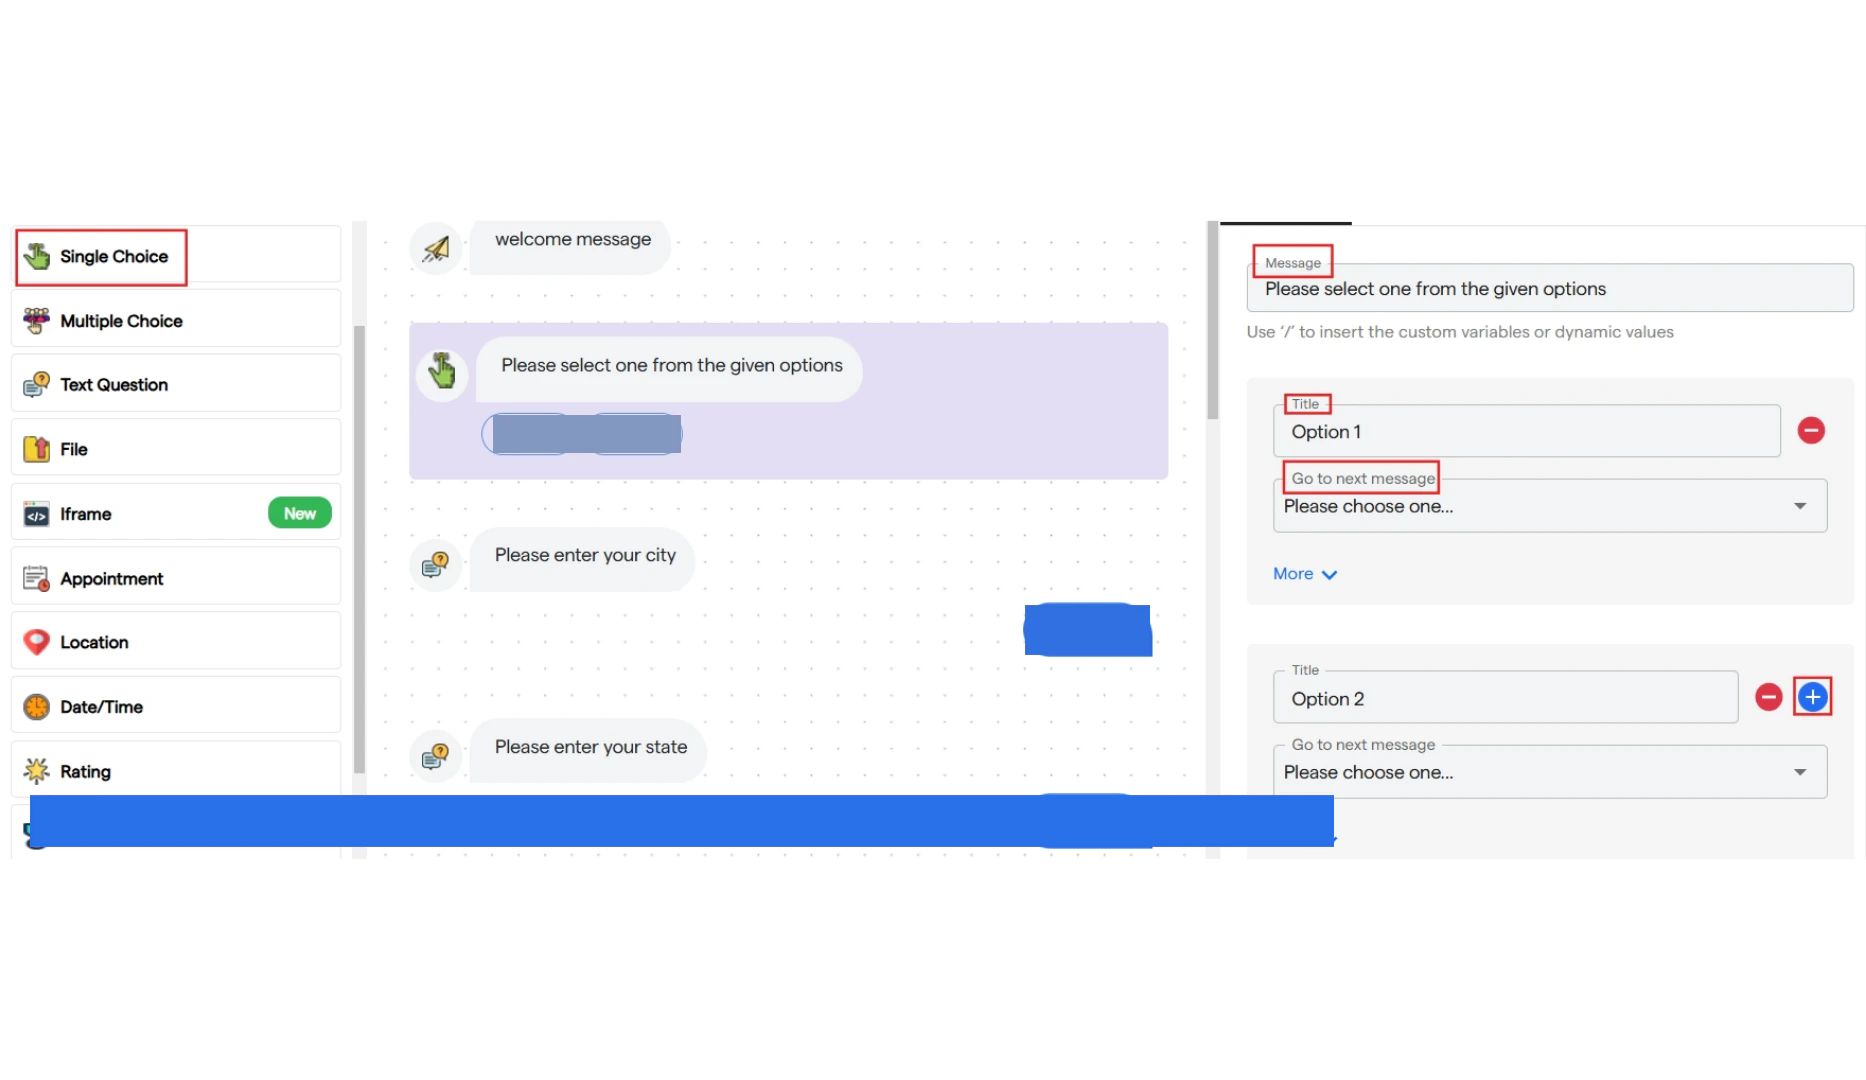
* It is used to create a single-choice selection request for the user.
* Click on "Single Choice" to add it to your flow.
* You can customize the message, set a title for your options, and link each option to the next component.
* You can add up to 5 options.
### **4. Single Choice**
* It is used to create a single-choice selection request for the user.
* Click on "Single Choice" to add it to your flow.
* You can customize the message, set a title for your options, and link each option to the next component.
* You can add up to 5 options.
 ### **5. Multiple Choice**
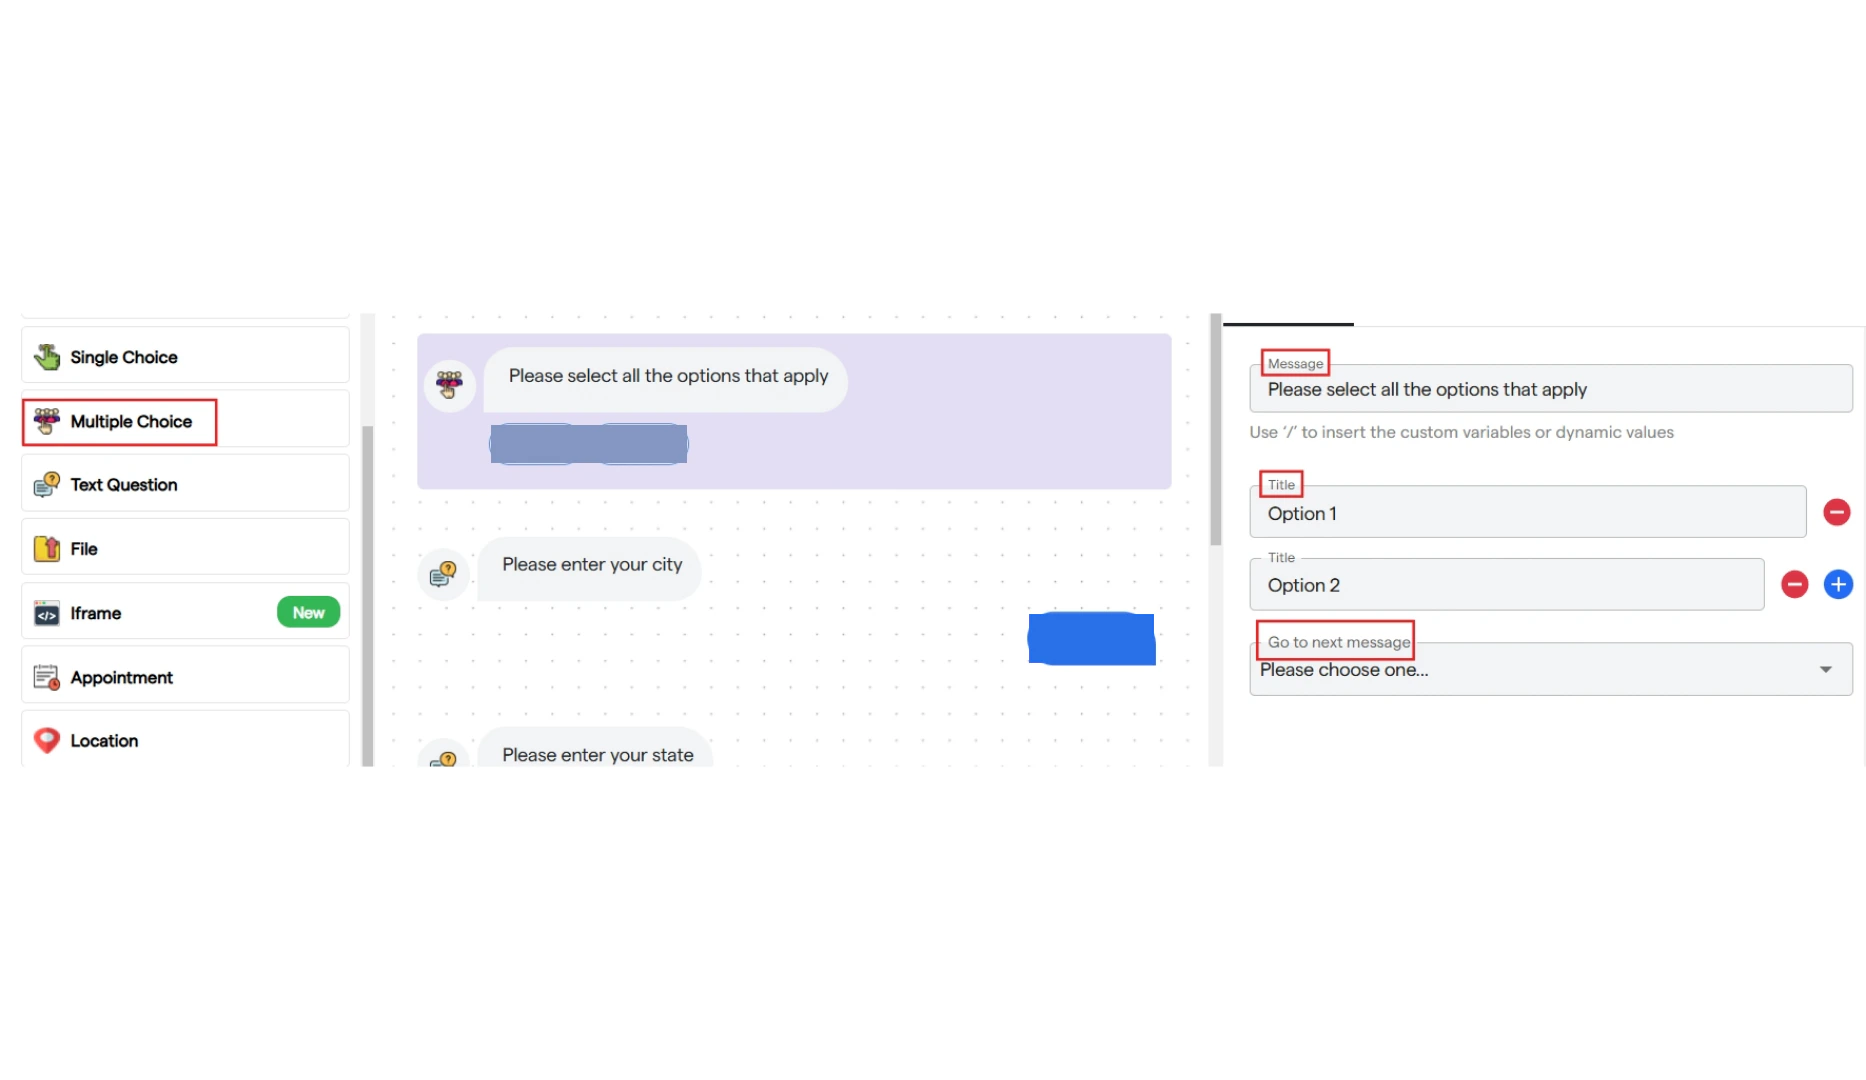
* It is used to create a multiple-choice selection request for the user.
* Click on "Multiple Choice" to add it to your flow.
* You can customize the message, set a title for your options, and link each option to the next component.
* You can add up to 5 options.
### **5. Multiple Choice**
* It is used to create a multiple-choice selection request for the user.
* Click on "Multiple Choice" to add it to your flow.
* You can customize the message, set a title for your options, and link each option to the next component.
* You can add up to 5 options.
 ### **6. Text Questions**
* It is used to request "any answer" as information from the user.
* Click on "Text Question" to add it to your flow.
* You can customize the information request message to appropriately ask for an answer from the user.
### **6. Text Questions**
* It is used to request "any answer" as information from the user.
* Click on "Text Question" to add it to your flow.
* You can customize the information request message to appropriately ask for an answer from the user.
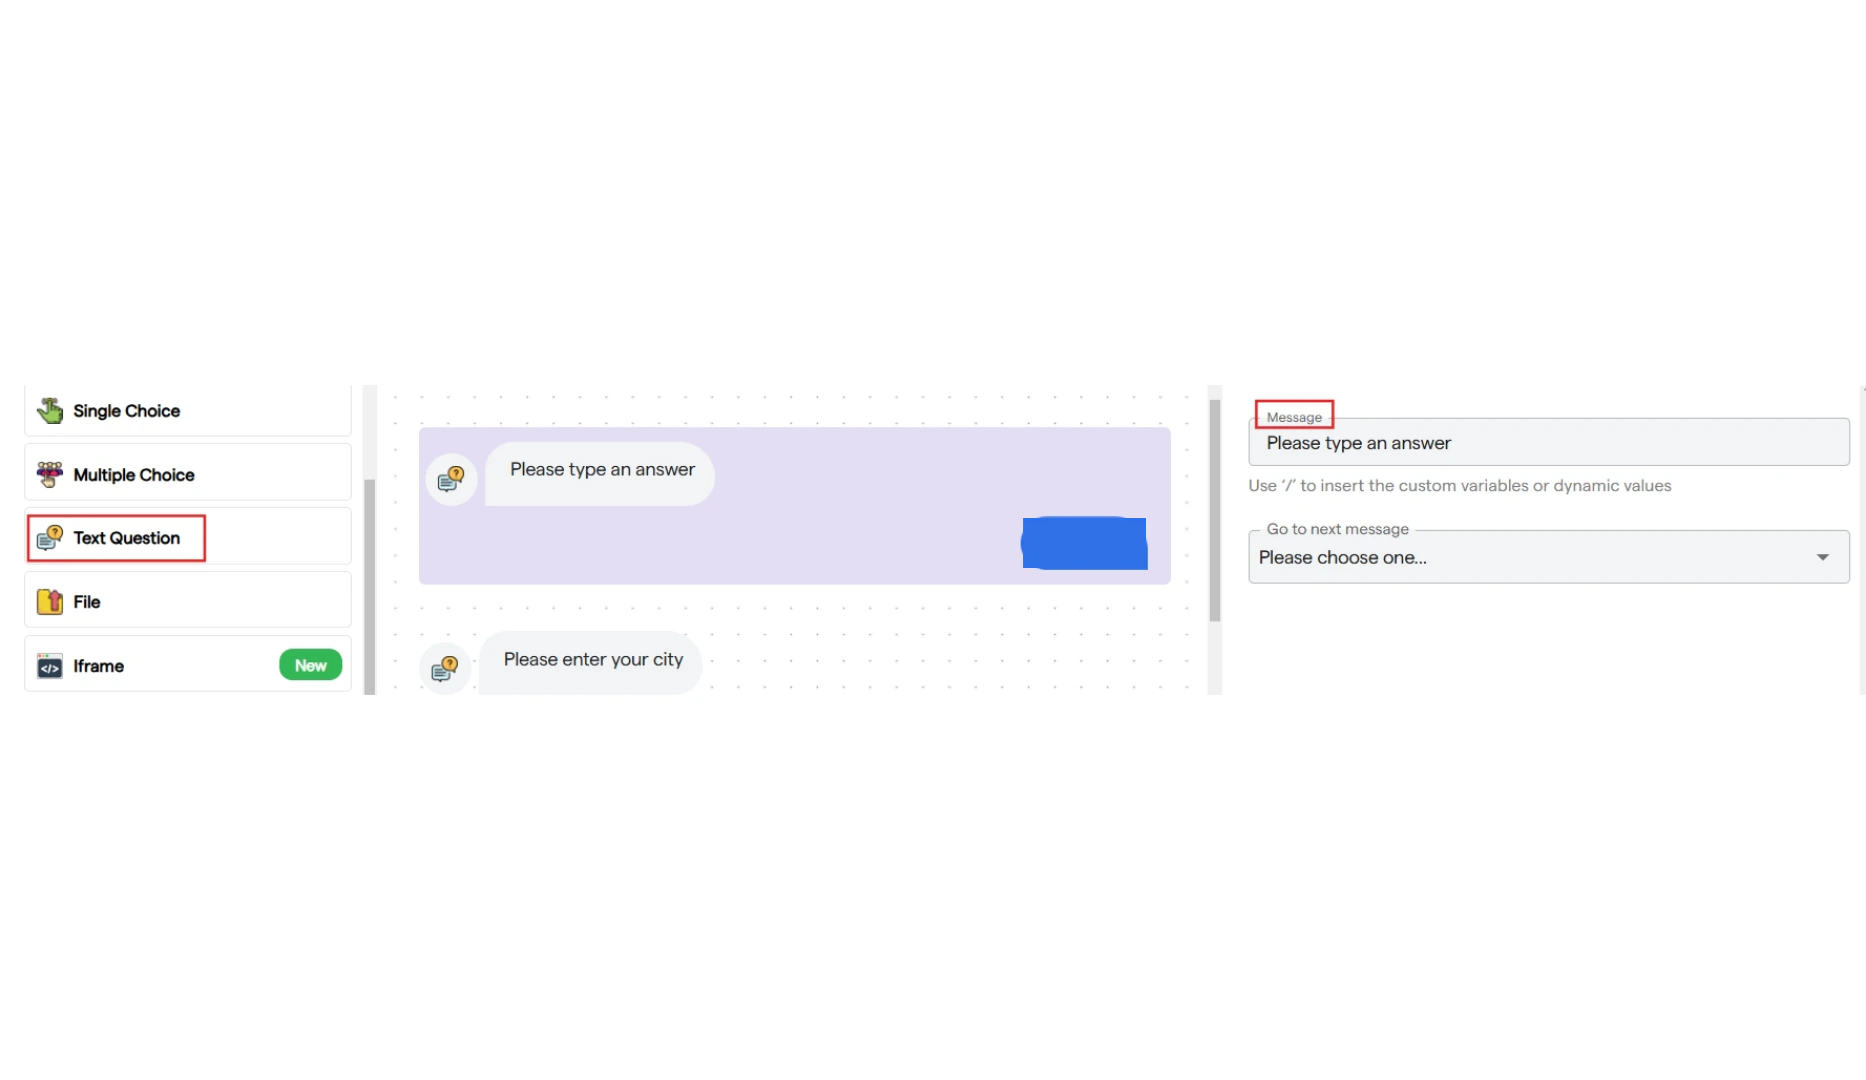 ### **7. File Upload**
* It is used to request "a file, image, or video" as information from the user.
* Click on "File" to add it to your flow.
* You can customize the file request message using the left panel.
### **7. File Upload**
* It is used to request "a file, image, or video" as information from the user.
* Click on "File" to add it to your flow.
* You can customize the file request message using the left panel.
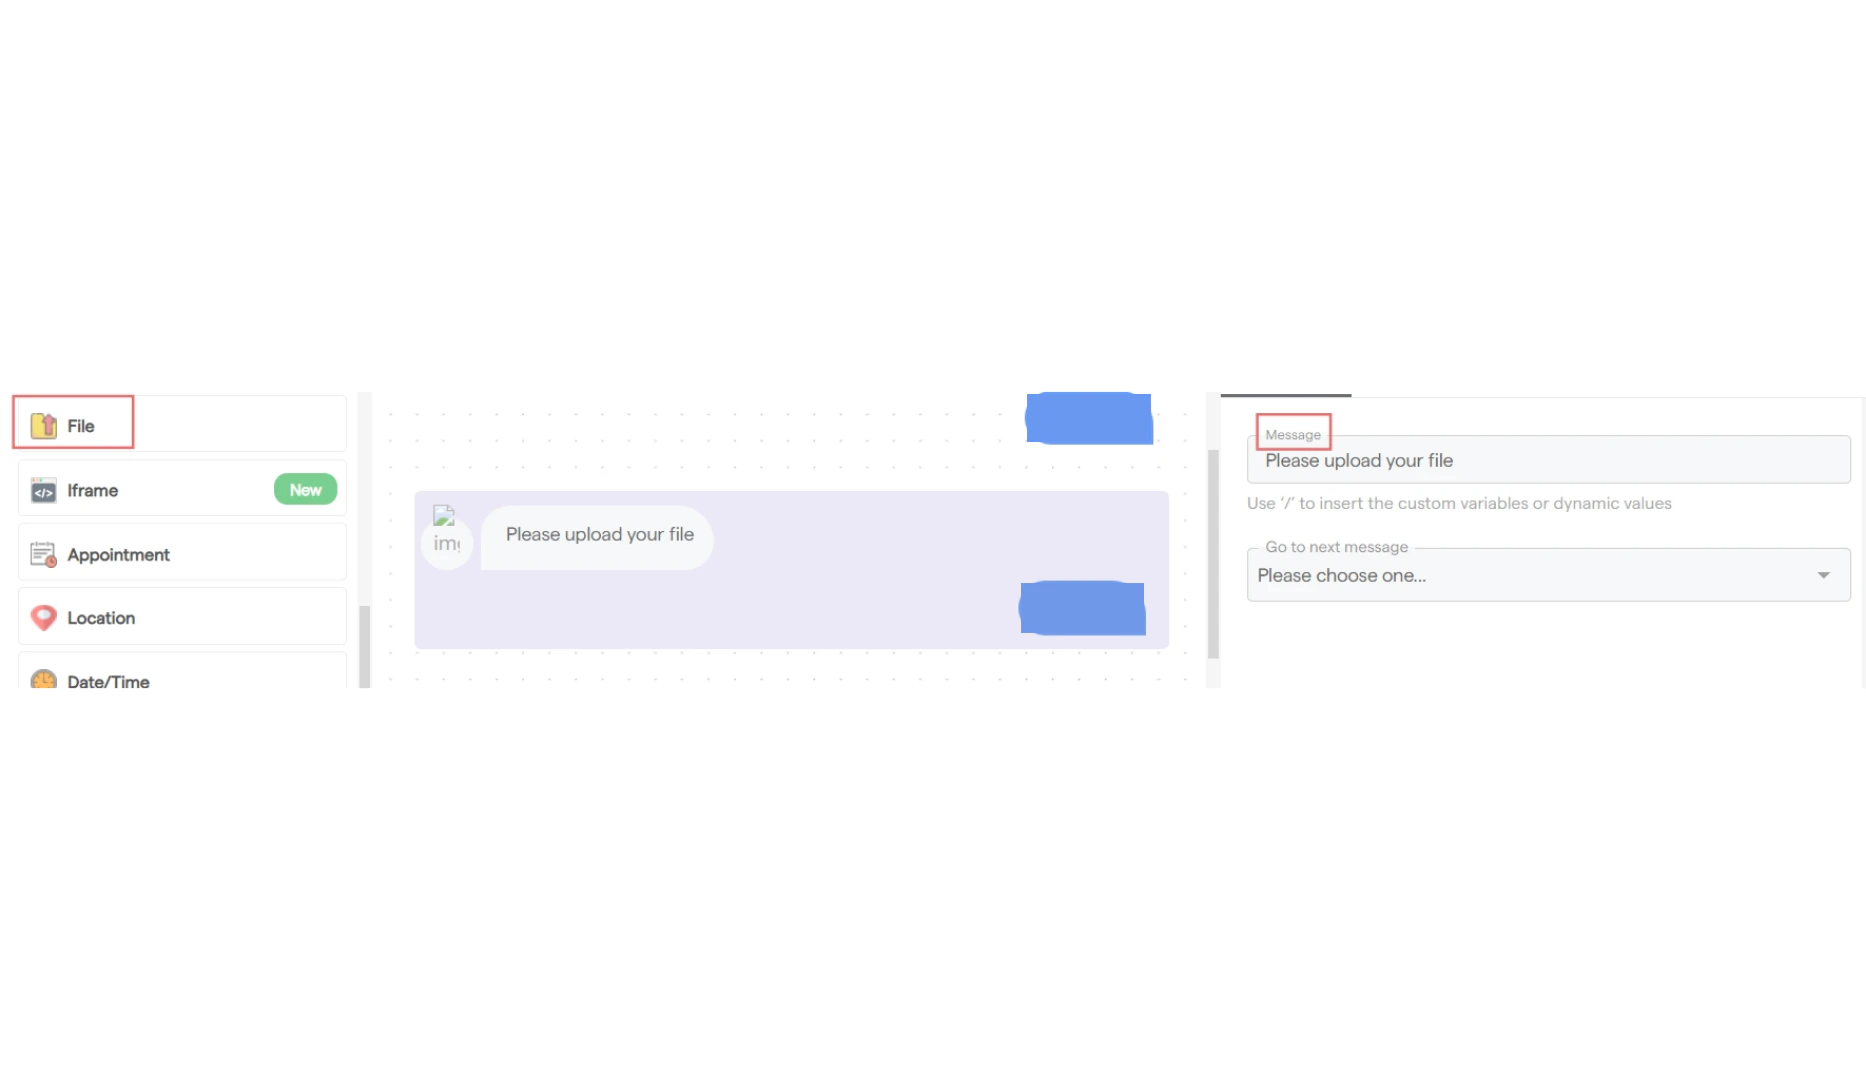 ### **8. Iframe**
* It is used to create an iframe.
* You can add a text message describing the iframe you are adding.
* Paste the URL of the web page.
* Provide a title for the iframe and add a CTA button that users can click to be redirected.
* Once clicked, the web page will open.
### **8. Iframe**
* It is used to create an iframe.
* You can add a text message describing the iframe you are adding.
* Paste the URL of the web page.
* Provide a title for the iframe and add a CTA button that users can click to be redirected.
* Once clicked, the web page will open.
 ### **9. Appointment**
* It is used to book an appointment and time slot for users.
* You can configure the message text and add a prompt asking the user to input a time slot.
* Select the start and end time for availability hours from the dropdown.
* The user will be able to book within these availability hours.
* Choose the slot intervals, which will determine the time gaps between bookings.
* Select the future booking days for which slots will be available to book.
* Finally, choose a third-party app to integrate with the bot for appointment booking.
### **10. Location**
* It is used to request a textual location from the user.
* Click on "Location" to add it to your flow.
* Enter a message text to ask the user for their location as information.
### **11. Date/Time**
* It is used to take the date and time as input from the user.
* You can enter a message text to request this information and select the checkbox to show the time selection option.
* The user will be given the option to select a date and the exact time for that date from a calendar.
### **12. Rating**
* It is used to ask the user to provide a rating and share their experience.
* You can enter a text message for this request and add 5 different options for user experience that the user can select.
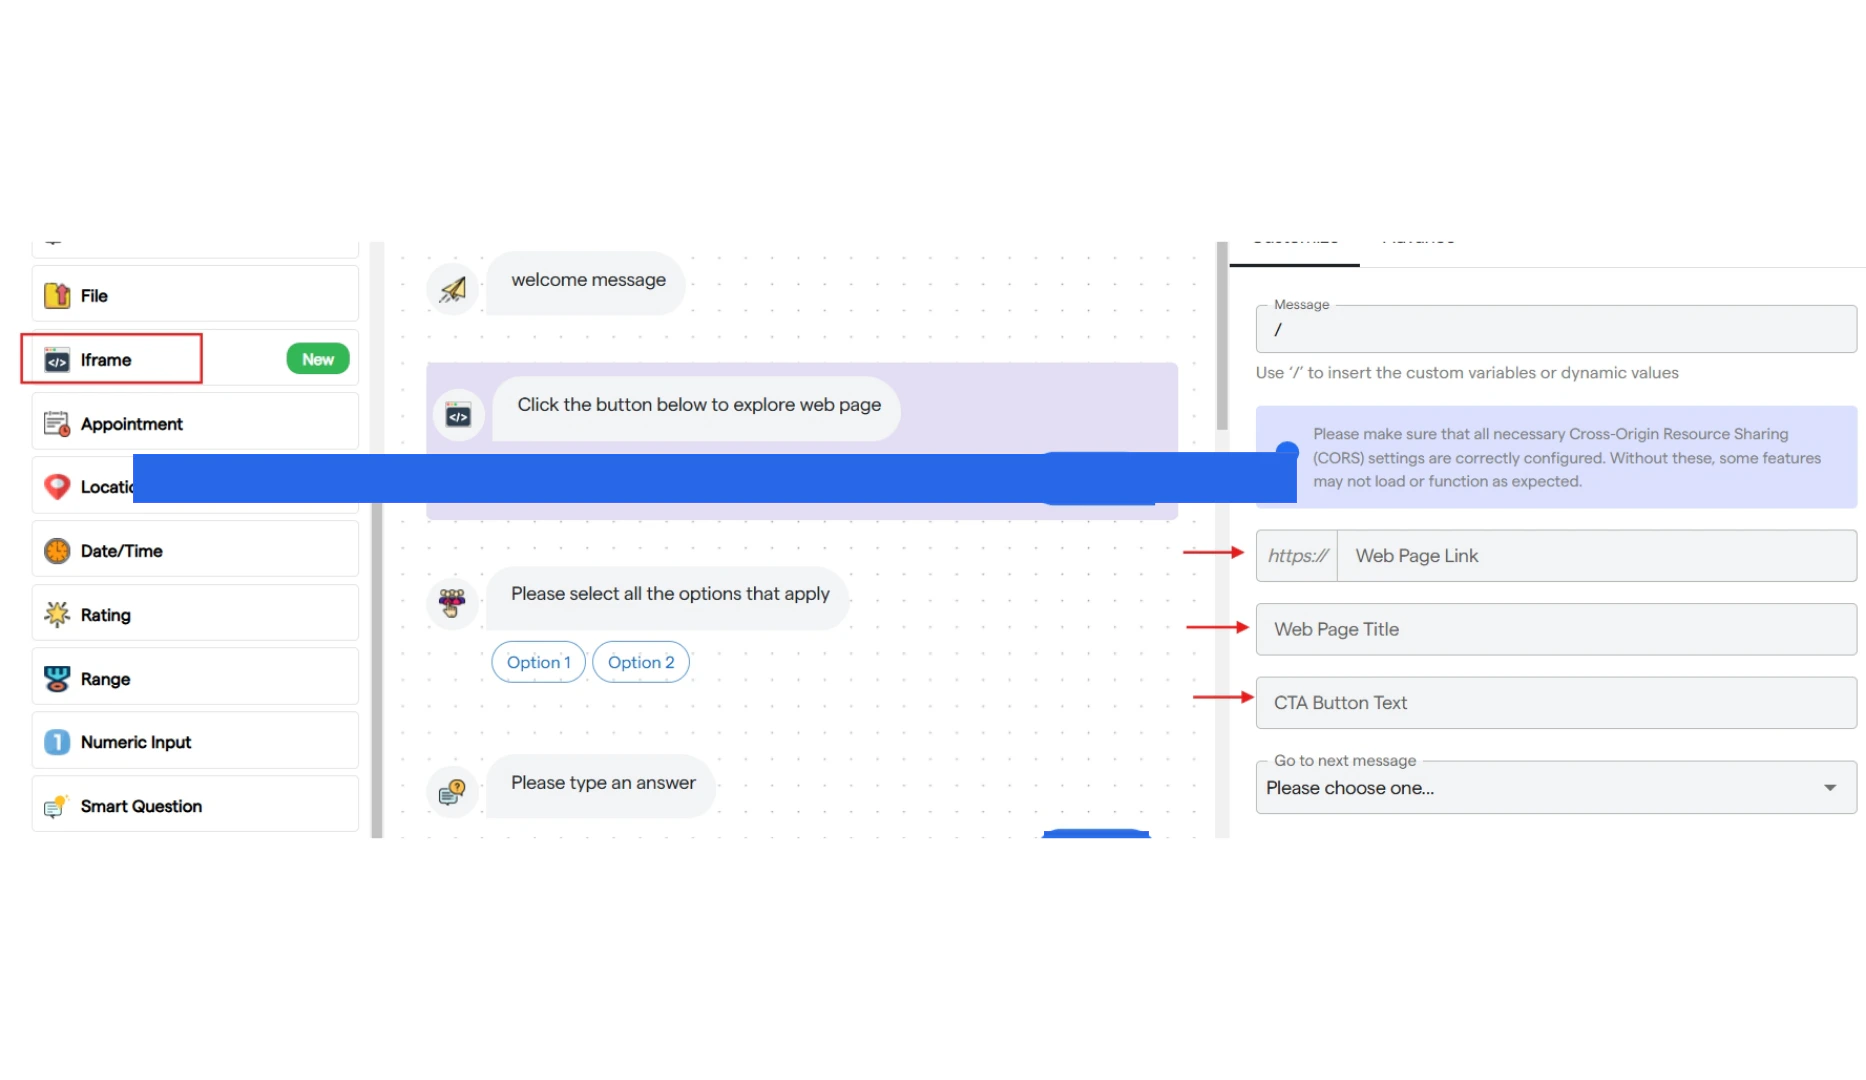
### **13. Range**
* It is used to ask the user for a range according to the requirements.
* You can enter a text message for this request.
* Add a prefix and suffix text to be used in the range.
* Then, select the starting point and highest point for the range.
* You can also choose a step value to set the gap in the range slider.
### **9. Appointment**
* It is used to book an appointment and time slot for users.
* You can configure the message text and add a prompt asking the user to input a time slot.
* Select the start and end time for availability hours from the dropdown.
* The user will be able to book within these availability hours.
* Choose the slot intervals, which will determine the time gaps between bookings.
* Select the future booking days for which slots will be available to book.
* Finally, choose a third-party app to integrate with the bot for appointment booking.
### **10. Location**
* It is used to request a textual location from the user.
* Click on "Location" to add it to your flow.
* Enter a message text to ask the user for their location as information.
### **11. Date/Time**
* It is used to take the date and time as input from the user.
* You can enter a message text to request this information and select the checkbox to show the time selection option.
* The user will be given the option to select a date and the exact time for that date from a calendar.
### **12. Rating**
* It is used to ask the user to provide a rating and share their experience.
* You can enter a text message for this request and add 5 different options for user experience that the user can select.
### **13. Range**
* It is used to ask the user for a range according to the requirements.
* You can enter a text message for this request.
* Add a prefix and suffix text to be used in the range.
* Then, select the starting point and highest point for the range.
* You can also choose a step value to set the gap in the range slider.
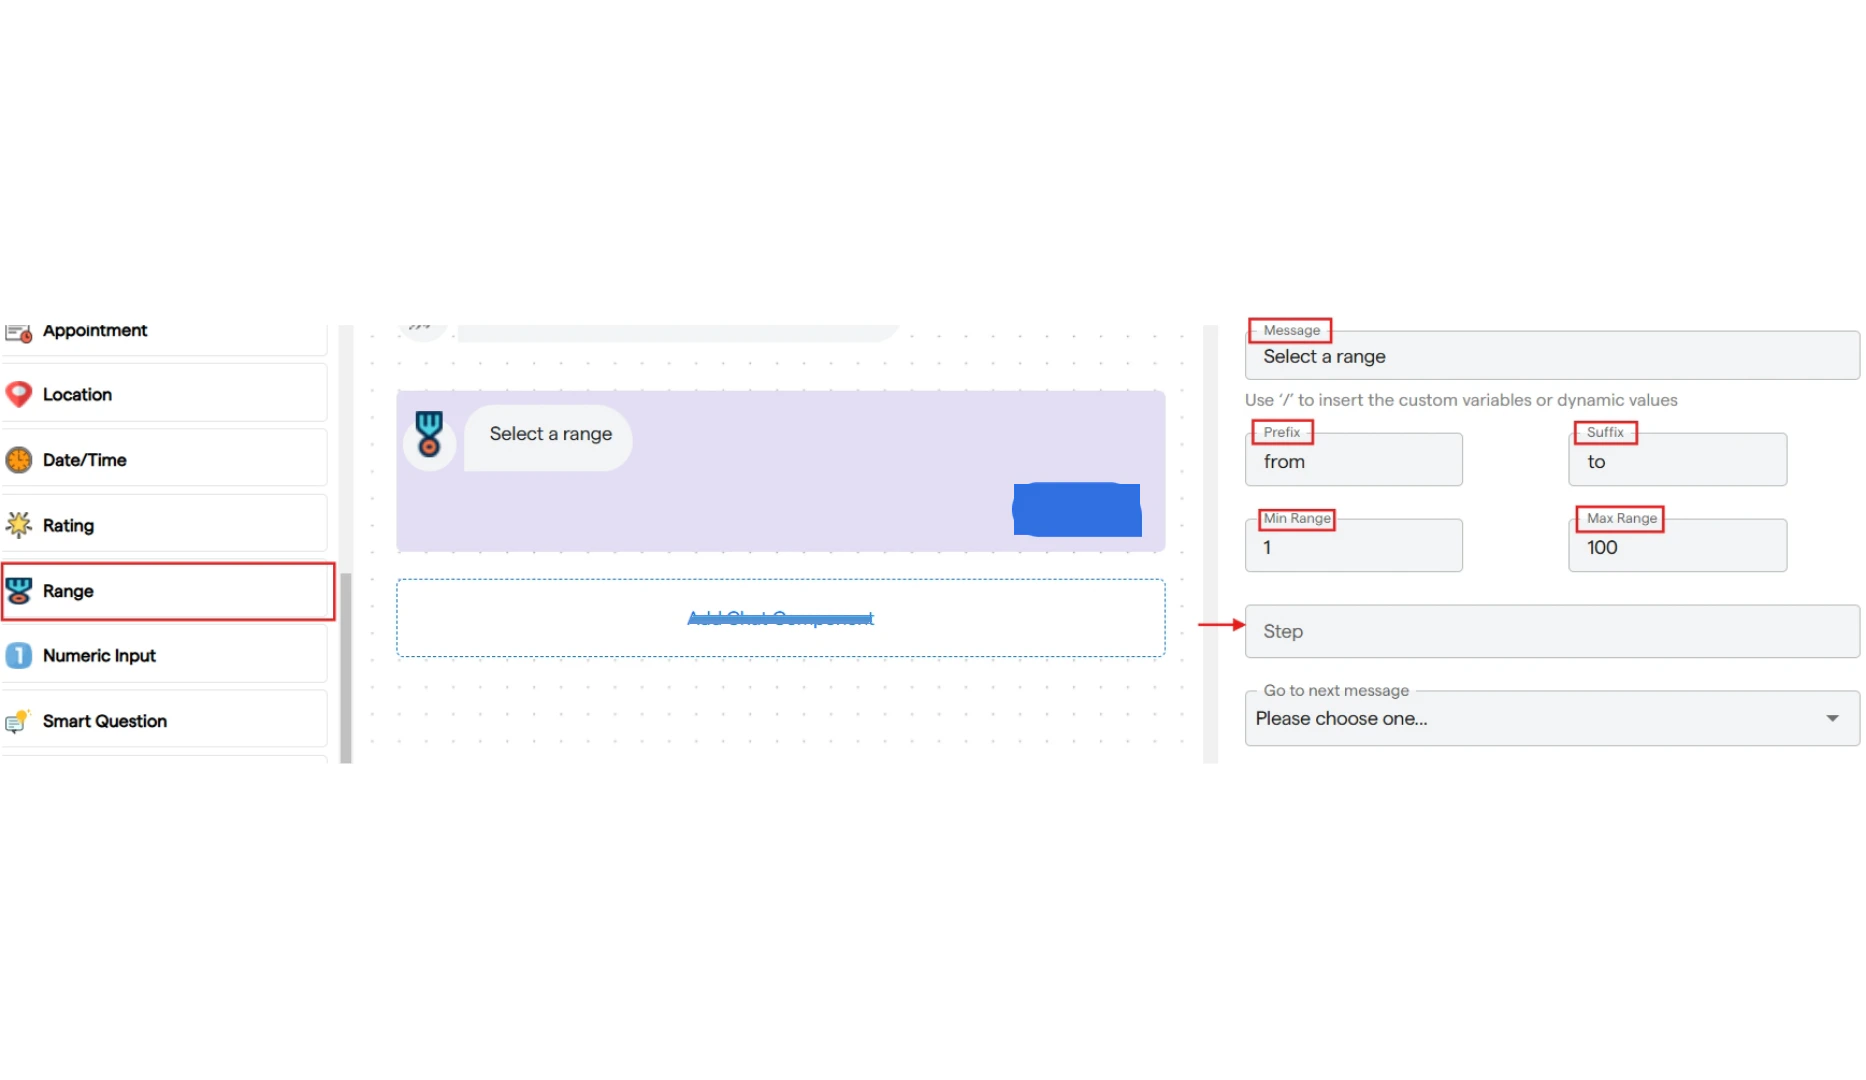 ### **14. Numeric Input**
* It is used to take a numerical input from the user.
* Click on "Number Input" to add it to your flow.
* You can add a text message to request the user to enter a numerical value.
### **15. Smart Question**
* It is used to ask the user a question, based on which the next chat flow will be decided.
* You can enter a text message or your question.
* Then, enter keywords based on which the next chat component will be selected.
* You can select the smart keyword match type, which can be either exact or based on the presence of keywords in the answer.
* You can add multiple smart keywords.
### **16. Redirect**
* It is used to start a new flow that has been created for the same bot.
* You can enter a text message and select the pre-built chat flow from the dropdown.
* Once the component is triggered, the selected chat flow will continue in the conversation.
### **17. API**
* It is used to integrate a third-party service in the chat flow.
* You can select the API.
* Then, add the text for the response code and select the next message.
* Response Code 200 indicates success, while 400 indicates an error.
You can also check the DEVELOPERS section for more information.
### **14. Numeric Input**
* It is used to take a numerical input from the user.
* Click on "Number Input" to add it to your flow.
* You can add a text message to request the user to enter a numerical value.
### **15. Smart Question**
* It is used to ask the user a question, based on which the next chat flow will be decided.
* You can enter a text message or your question.
* Then, enter keywords based on which the next chat component will be selected.
* You can select the smart keyword match type, which can be either exact or based on the presence of keywords in the answer.
* You can add multiple smart keywords.
### **16. Redirect**
* It is used to start a new flow that has been created for the same bot.
* You can enter a text message and select the pre-built chat flow from the dropdown.
* Once the component is triggered, the selected chat flow will continue in the conversation.
### **17. API**
* It is used to integrate a third-party service in the chat flow.
* You can select the API.
* Then, add the text for the response code and select the next message.
* Response Code 200 indicates success, while 400 indicates an error.
You can also check the DEVELOPERS section for more information.