Step 1: Access the Developer Dashboard
- Open your web browser and navigate to the Meta Developer Dashboard.
- Log in to your developer account using your credentials.
Step 2: Configure Webhooks
-
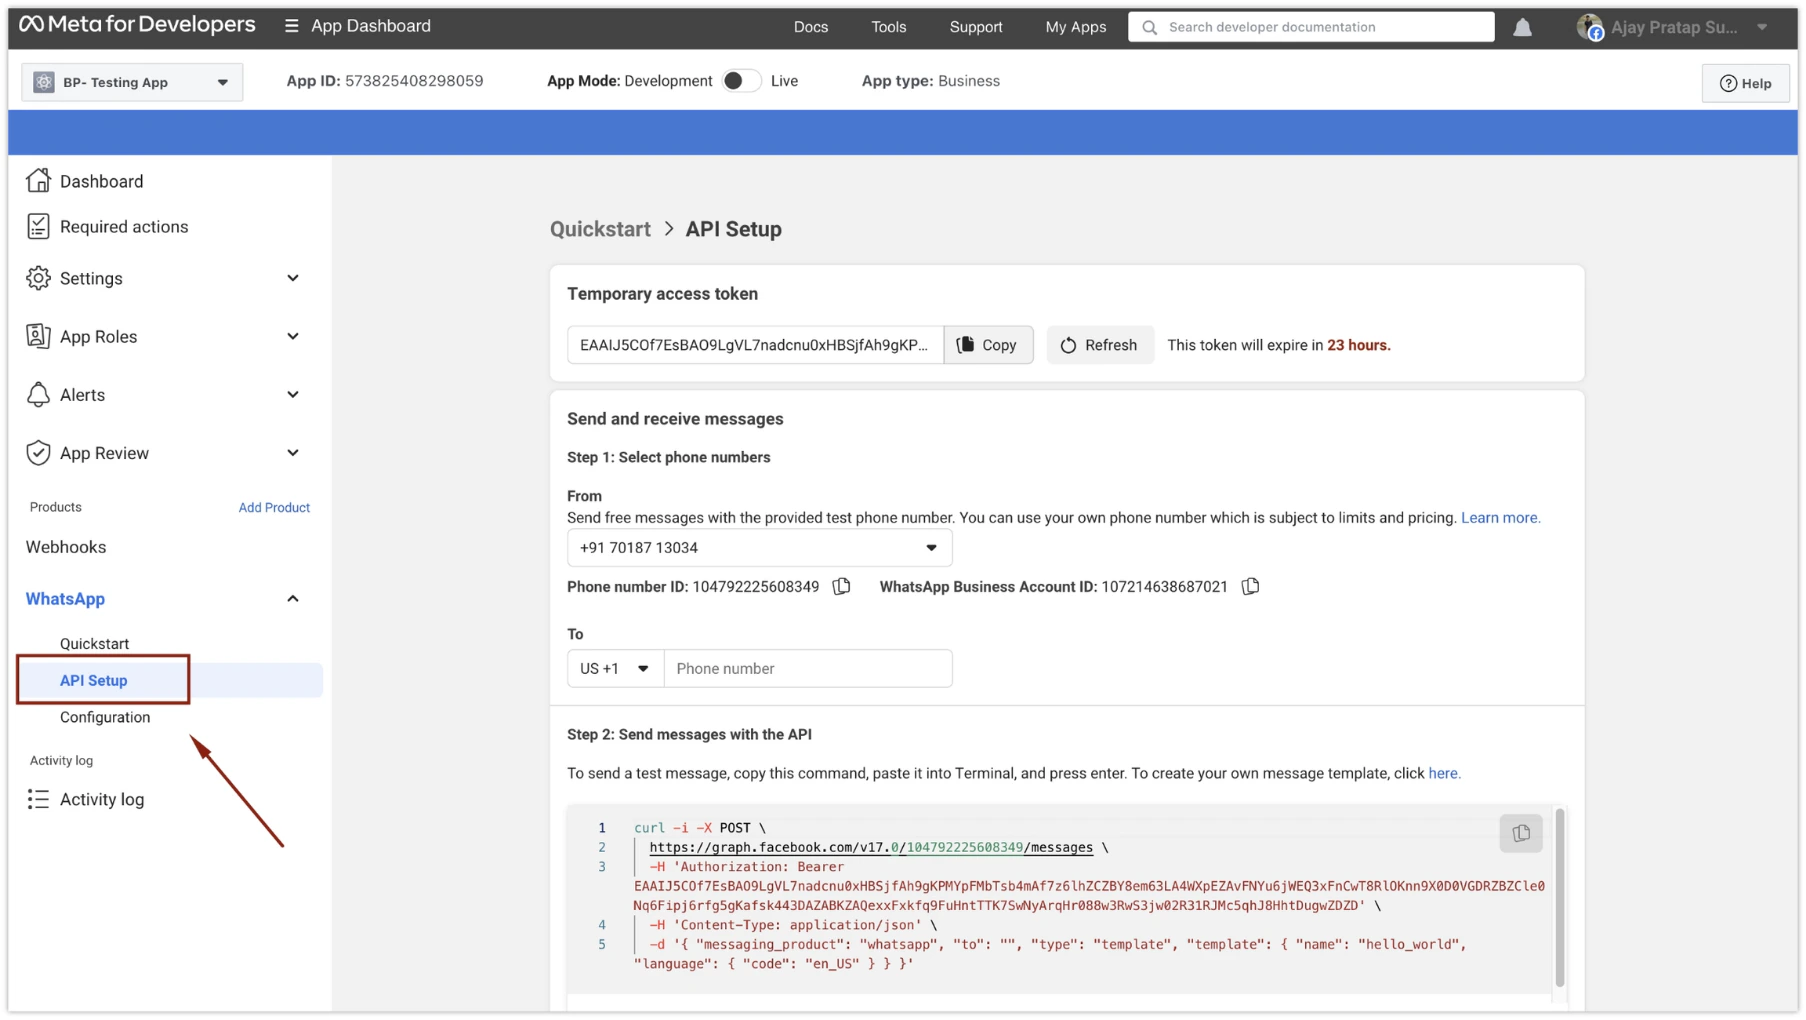
Go to the “API Setup” section under “WhatsApp” in the dashboard sidebar.
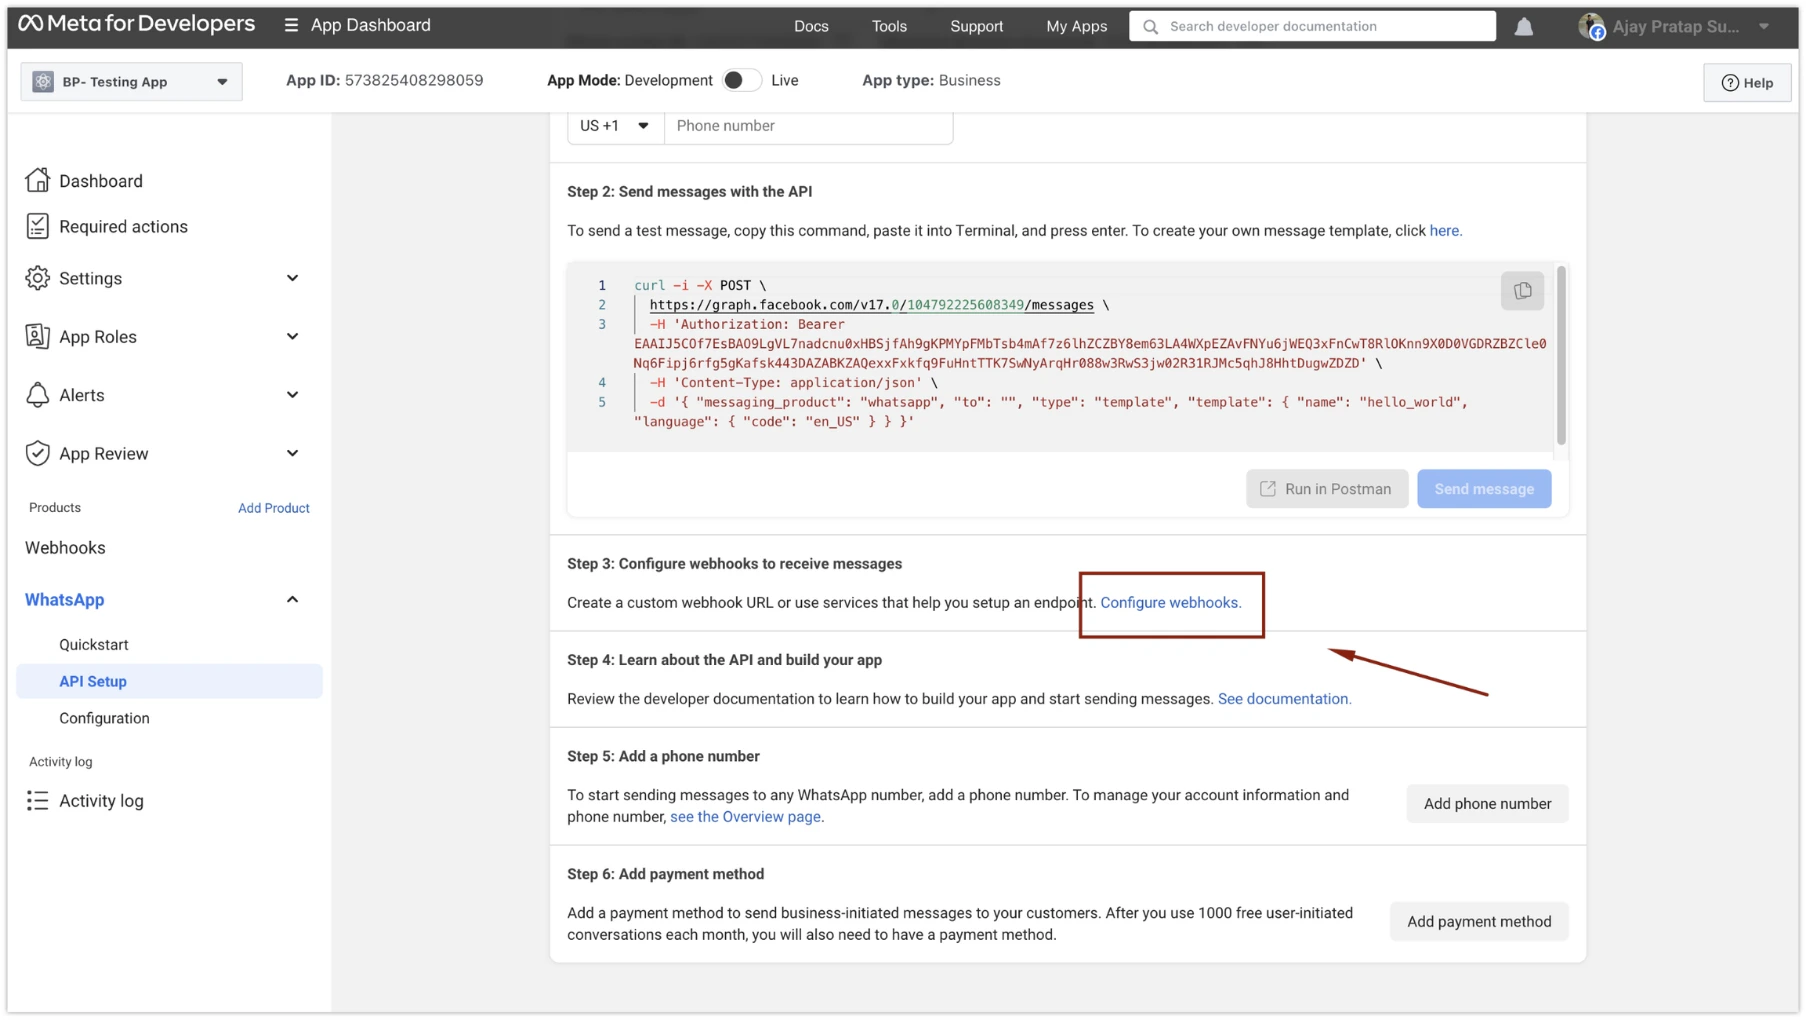
- Proceed to “Step 3: Configure webhooks to receive messages” in the API setup page.
-
Click on the “Configure webhooks” button.
Step 3: Edit Webhook Callback URL
-
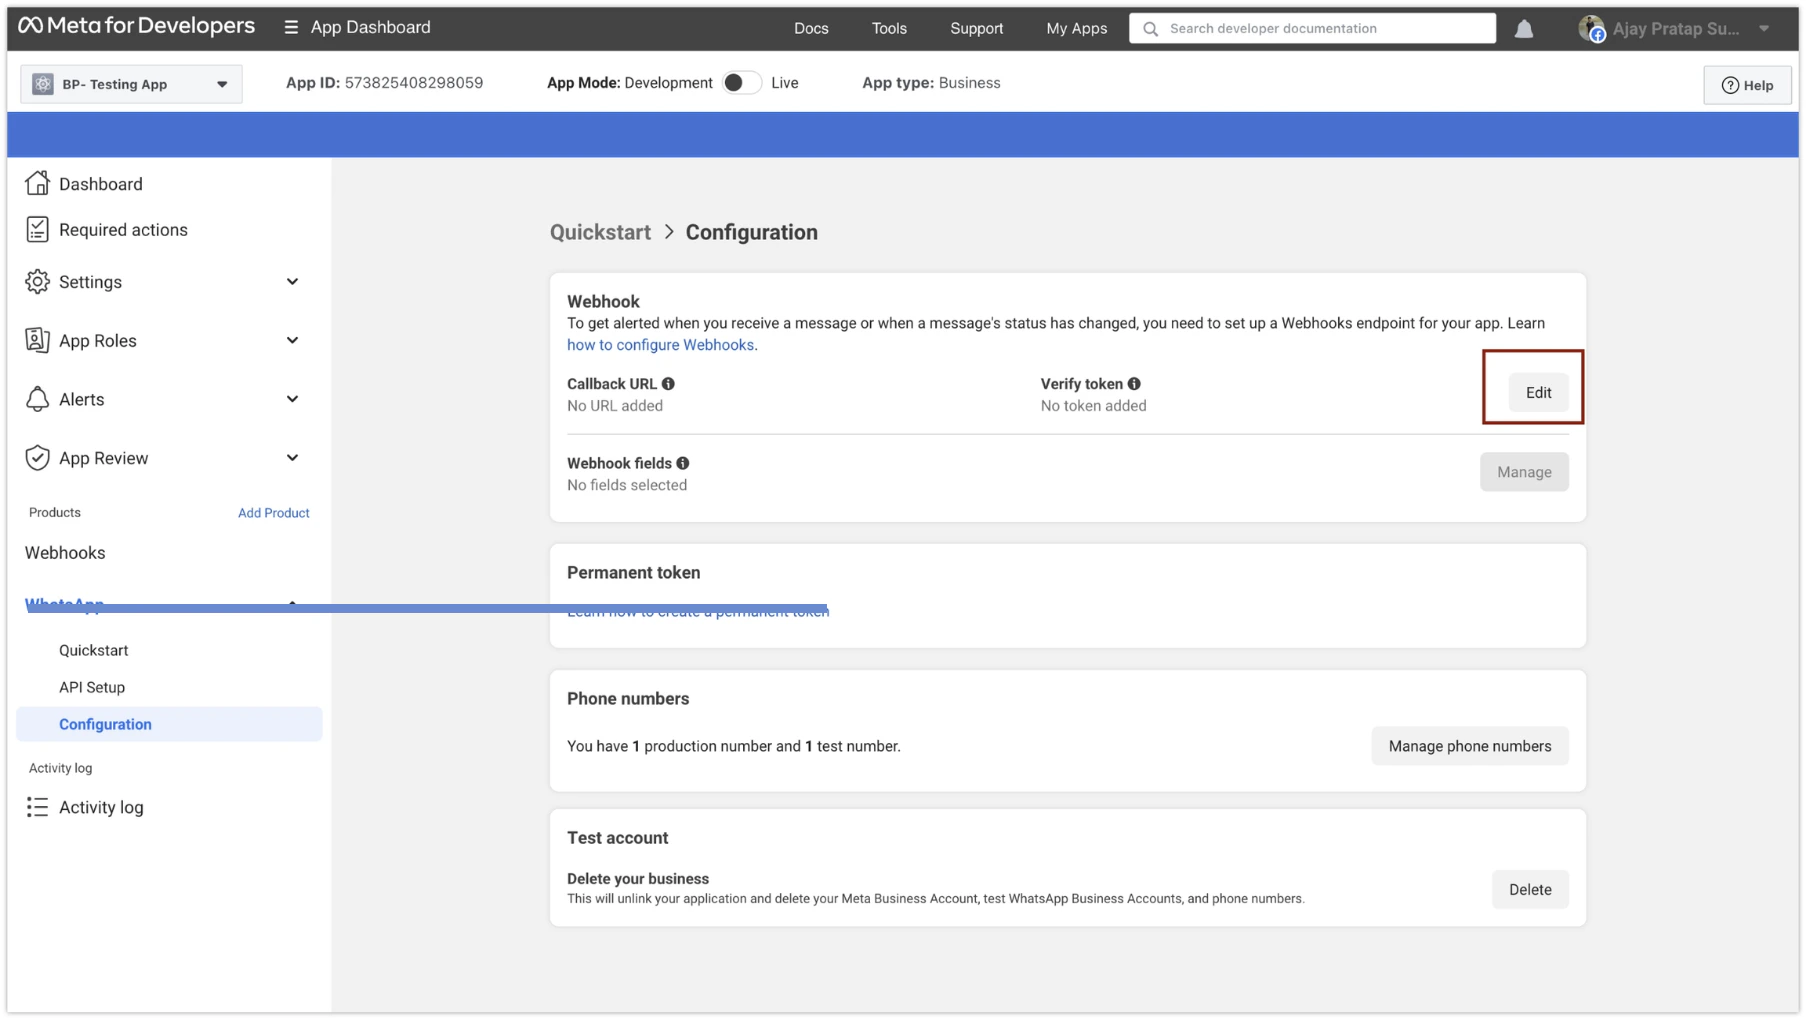
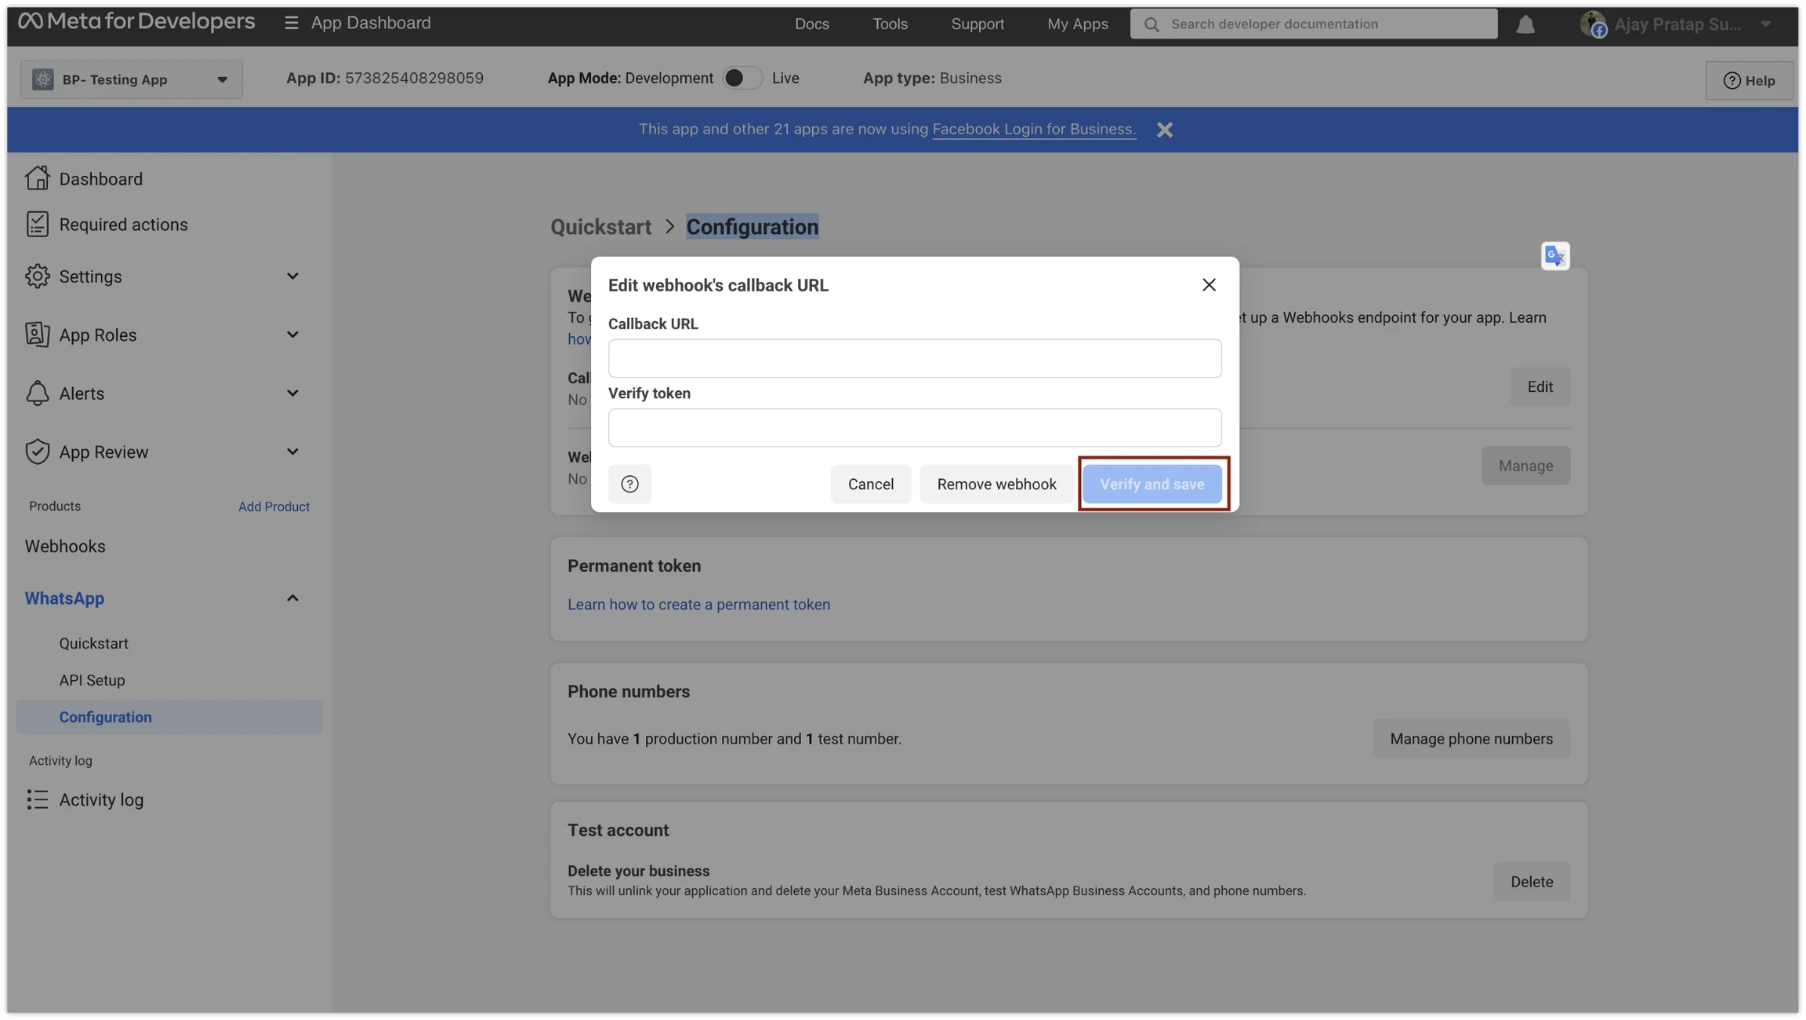
Under the “Configuration” page, click on the “Edit” button.
- A pop-up titled “Edit webhook’s callback URL” will open.
-
After entering the details, click on the “Verify and save” button.
Step 4: Subscribe to Webhook Fields
-
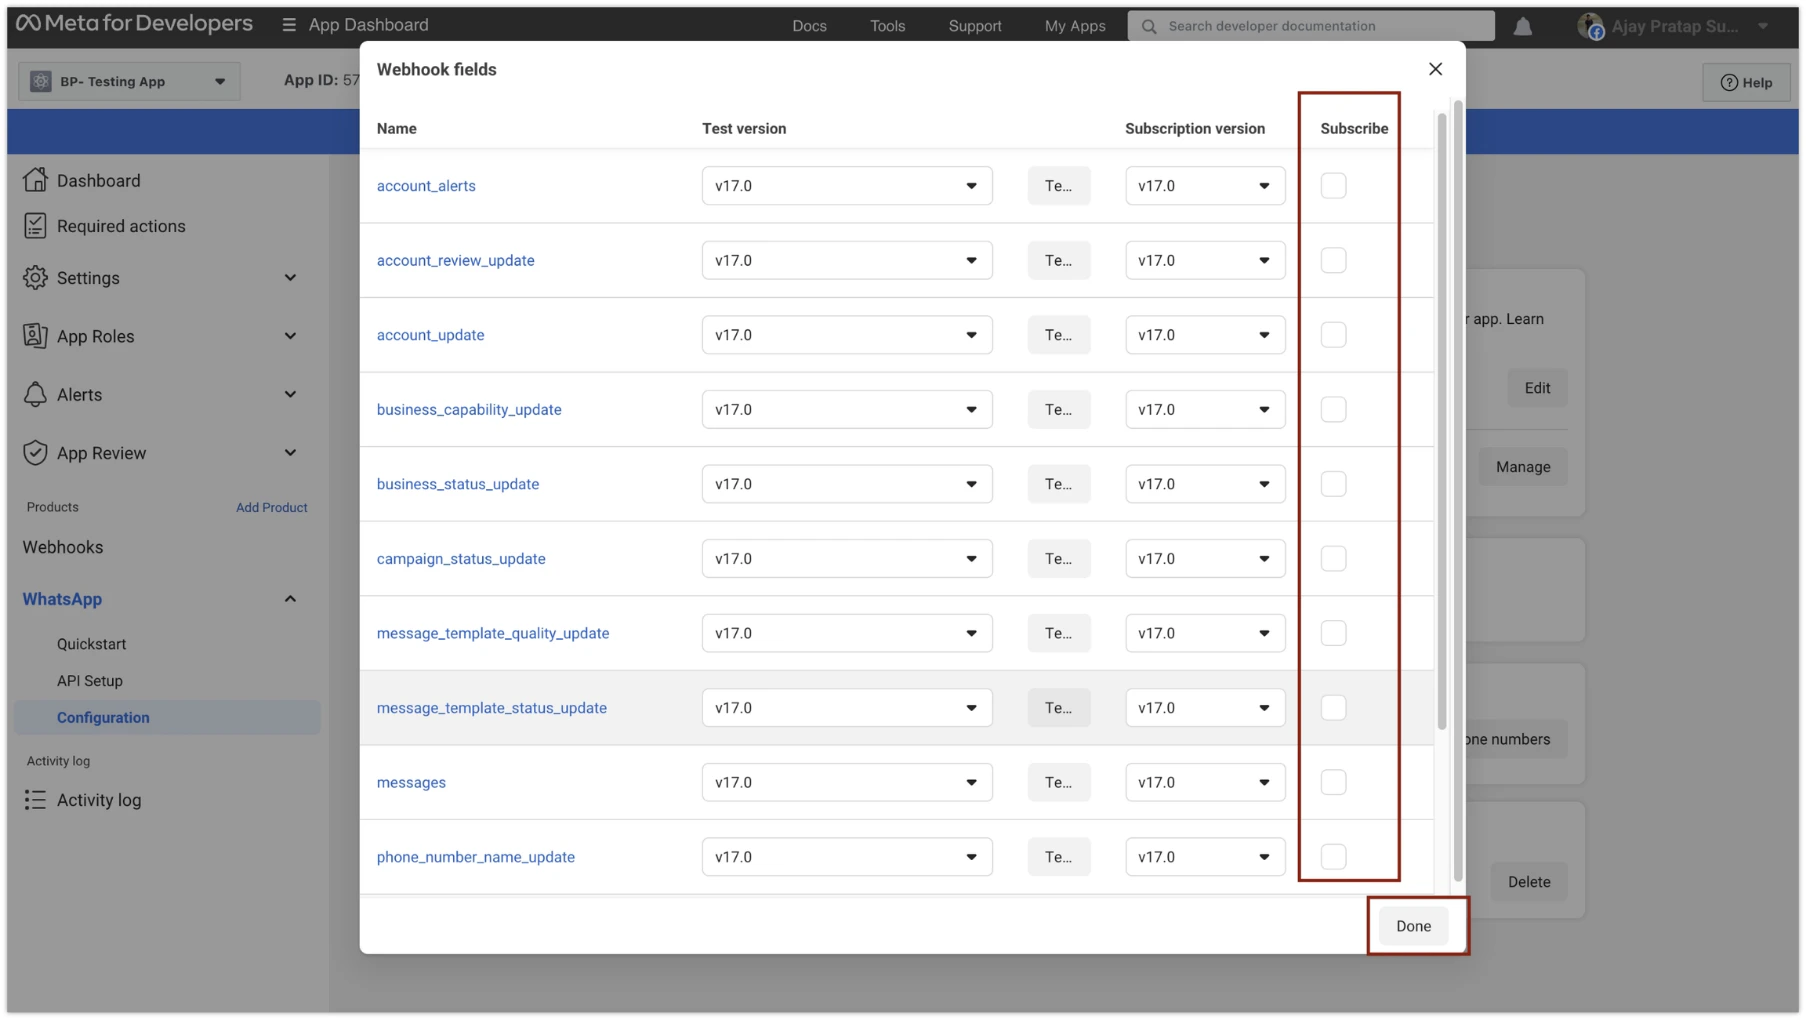
Once the webhook URL is saved, click on the “Manage” button to subscribe to the webhook fields.
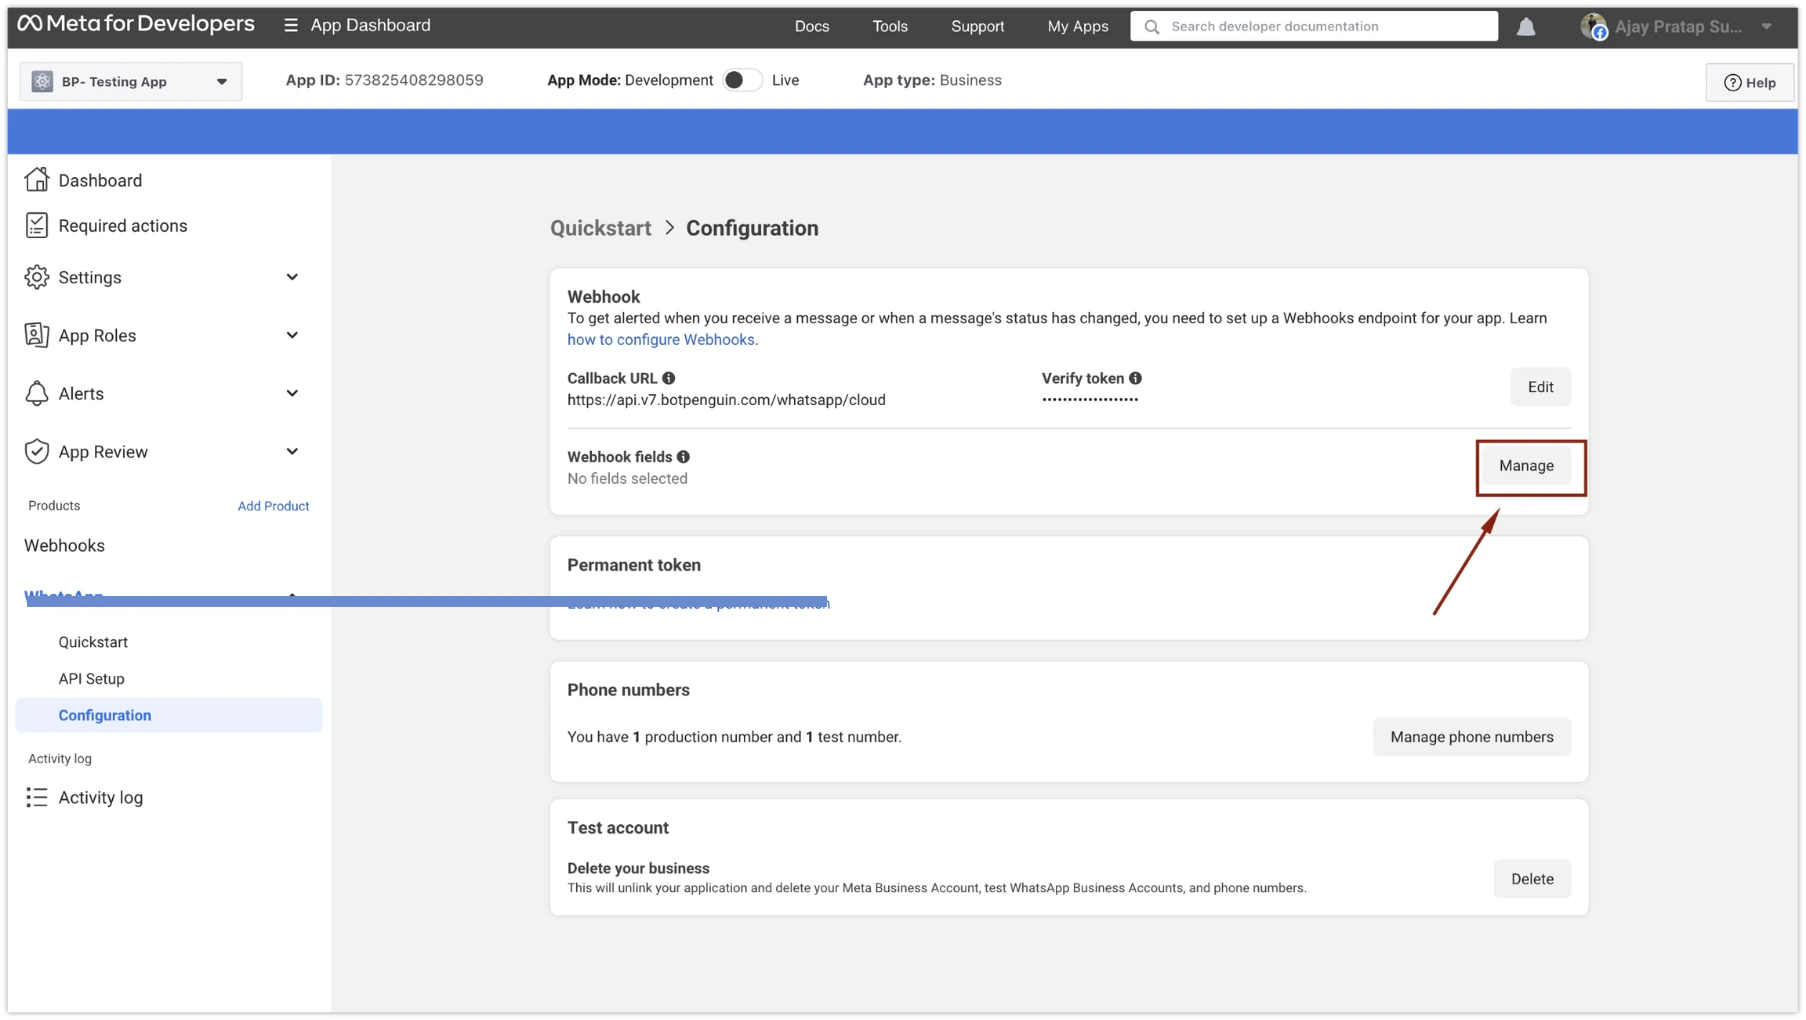
- When the “Webhook fields” pop-up appears, subscribe to all available fields.
-
Save your selections.